Capturing Desktop Screencasts Using Movavi Screen Capture Studio
In simple terms a desktop screencast is a type of video recording – but instead of recording using a video camera, it uses software to record actions from your computer screen (i.e. your desktop). It is safe to say that you’ve probably seen videos created using this method, including things like instructional guides, software demonstrations, and so on.
Seeing as you’ll need a desktop recording software to capture a screencast – you should try Movavi Screen Capture Studio. Not only will it let you quickly and easily record videos from your screen according to the precise parameters that you specify, but it also has other useful features as well.
Recording a Screencast
To record a screencast using Movavi Screen Capture Studio, start by launching the software. When you do you will be able to set it to record a specific part of your screen by drawing a frame using the mouse cursor. Alternatively you can select a specific window to record, or click anywhere so that the interface appears and select one of the presets listed under ‘Capture Area’.
The next parameter that you should set is the audio source, which you can specify using the ‘System Audio’ and ‘Microphone’ icons on Movavi Screen Capture Studio’s interface. Just click on them to toggle which audio source you wish to record, or highlight both to record them at the same time. Beside the icons you should see sliders that you can use to adjust the sound levels.
Before you start recording you also adjust the frame rate or set up Movavi Screen Capture Studio to record keyboard and mouse actions. If you want you could automate the recording by clicking on the ‘alarm clock’ icon, or you could control it manually using the ‘REC’ then ‘Stop’, ‘Cancel’, and ‘Pause’ buttons on the interface.
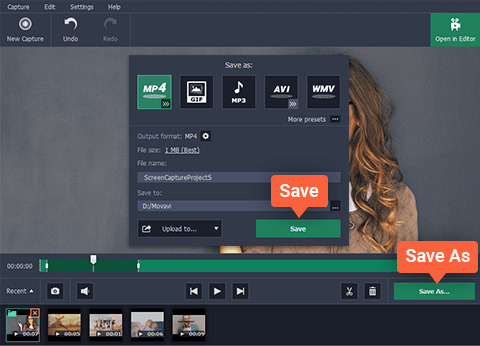
After you complete recording, you can preview the footage that you captured and save it then and there. However you may want to open it up in Movavi Screen Capture Studio’s built-in editor instead, as that will let you tweak and improve the footage further.
With the editing tools in Movavi Screen Capture Studio, you can transform the screencast that you record to make it look more impressive and professional. Its features will let you cut and join video segments, add captions, insert transitions, include audio tracks, and much more.
Due to the fact that Movavi Screen Capture Studio makes it easy to record screencasts, you should be able to get started relatively quickly. More importantly when you’re done you’ll have the tools to fully control how your video turns out – and can create amazing videos of your own with a bit of experimentation.