If you’ve ever jumped into a match, lost a gunfight you felt you should’ve won, and then immediately wondered, “Is my Xbox actually set up right?”—yeah, you’re not alone. This guide on How to Set Up Xbox Series X for FPS Games is built for that exact moment: when you want your aiming to feel crisp, your input lag to stay out of the way, and your setup to be predictable from one session to the next.
I’ll walk you through the settings that matter most for shooters: 120Hz, VRR, Game Mode/ALLM, FPS Boost for older titles, plus controller, audio, and a few practical troubleshooting fixes. Some of this is quick. Some of it is a little fiddly. But it’s all doable.
Who this is for (and what we’re optimizing)
This is written for players who mostly live in multiplayer shooters (or any game where reaction time matters) and want a setup that feels responsive and consistent. If you play casually, you’ll still benefit—but you may not care about every last millisecond the way competitive players do. Honestly, I go back and forth myself depending on the game.
The goal is simple: reduce “surprises.” Surprises like 120Hz not showing up, VRR being greyed out, a game quietly running in Quality mode, or FPS Boost being available but never actually enabled.
Start here: the hardware checks people skip
I know, it’s boring. But this is the part that causes most of the “Why can’t I select 120Hz?” headaches.
Use the right HDMI path
Ideally, connect your Xbox Series X directly to your TV or monitor. If you route through an older receiver, capture device, splitter, or some soundbar pass-through setup, you can accidentally cap bandwidth and lose 120Hz or VRR. If you must use pass-through, test direct-to-display first so you know what your screen can actually do.
Make sure your display actually supports 120Hz over HDMI
A display can be advertised as “120Hz,” but that doesn’t always mean it accepts 120Hz input from an external device in the way you expect. Some monitors do high refresh over DisplayPort on PC, but are limited over HDMI. So, check your display specs for 120Hz over HDMI and which HDMI version/ports support it.
If you’re setting up a monitor specifically, it’s worth reading our companion guide here: 120Hz not showing up on Xbox Series X. It’s the “I did everything, and the option still isn’t there” article.
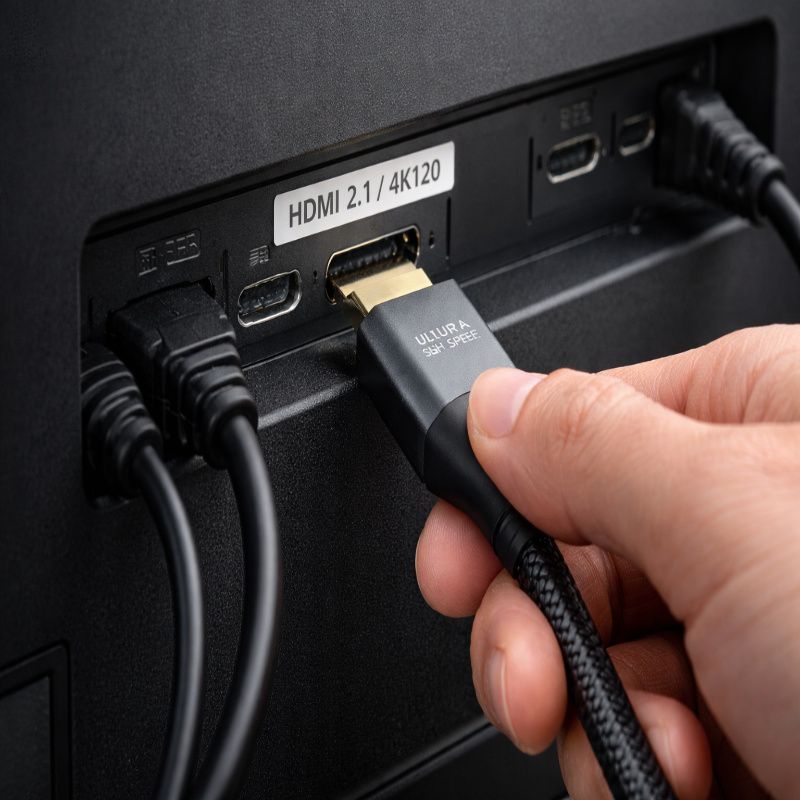
Use a proper HDMI cable (and the correct TV port)
For 4K at 120Hz, you typically need a high-bandwidth setup (often HDMI 2.1-capable). Some TVs only allow 4K/120 on one or two HDMI ports, so the port choice matters more than you’d think. If your TV has a “4K 120” or “HDMI 2.1” label on one port, use that one first.
How to Set Up Xbox Series X for FPS Games (the baseline setup)
This is the “get you stable and fast” section. Don’t worry about perfection yet. We’re building a baseline you can trust.
Step 1: Update your console and reboot once
Before you change a bunch of settings, make sure your Xbox is updated. This matters because certain features and compatibility toggles can behave strangely when the system has pending updates. Xbox also specifically notes that for FPS Boost you should ensure you’ve taken the latest update and rebooted your console.
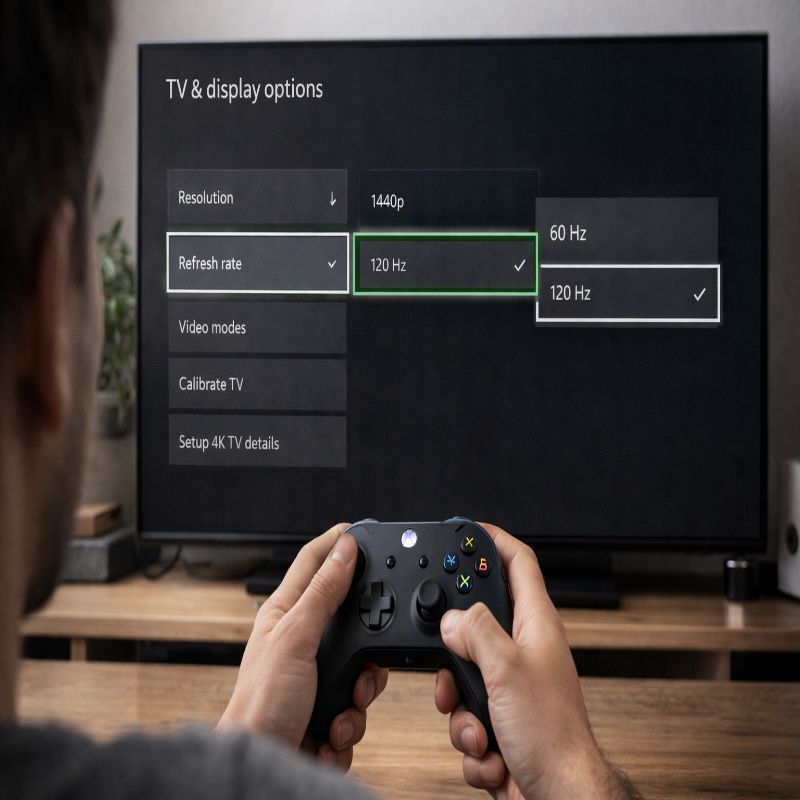
Step 2: Set resolution and refresh rate
On your Xbox, go to Settings, then General, then TV & display options. This is where you choose your resolution and refresh rate.
Here’s the practical approach I like:
- If your display supports it cleanly, try 4K UHD at 120Hz.
- If 4K/120 is unstable, or the option doesn’t show, try 1440p at 120Hz (or 1080p at 120Hz). Many competitive players happily trade some sharpness for the smoother feel.
Also, use the console’s “4K TV details” screen to confirm what your display reports as supported. It’s a quick sanity check before you spend time troubleshooting imaginary problems.
Step 3: Make sure the game itself is in Performance mode
This part trips people up. Even if your Xbox output is set to 120Hz, a lot of FPS titles still have their own graphics mode setting. Look for something like “Performance,” “120Hz,” or “High Frame Rate” in the game’s video settings. If you leave the game in a Quality mode, you can end up at 60fps even with a 120Hz-capable setup.
If you want a faster “just tell me what to pick” version, you can skim our settings template here: best Xbox Series X settings for FPS games. It’s not a replacement for this guide, but it’s handy mid-session.
Turn on the low-latency features (without overthinking it)
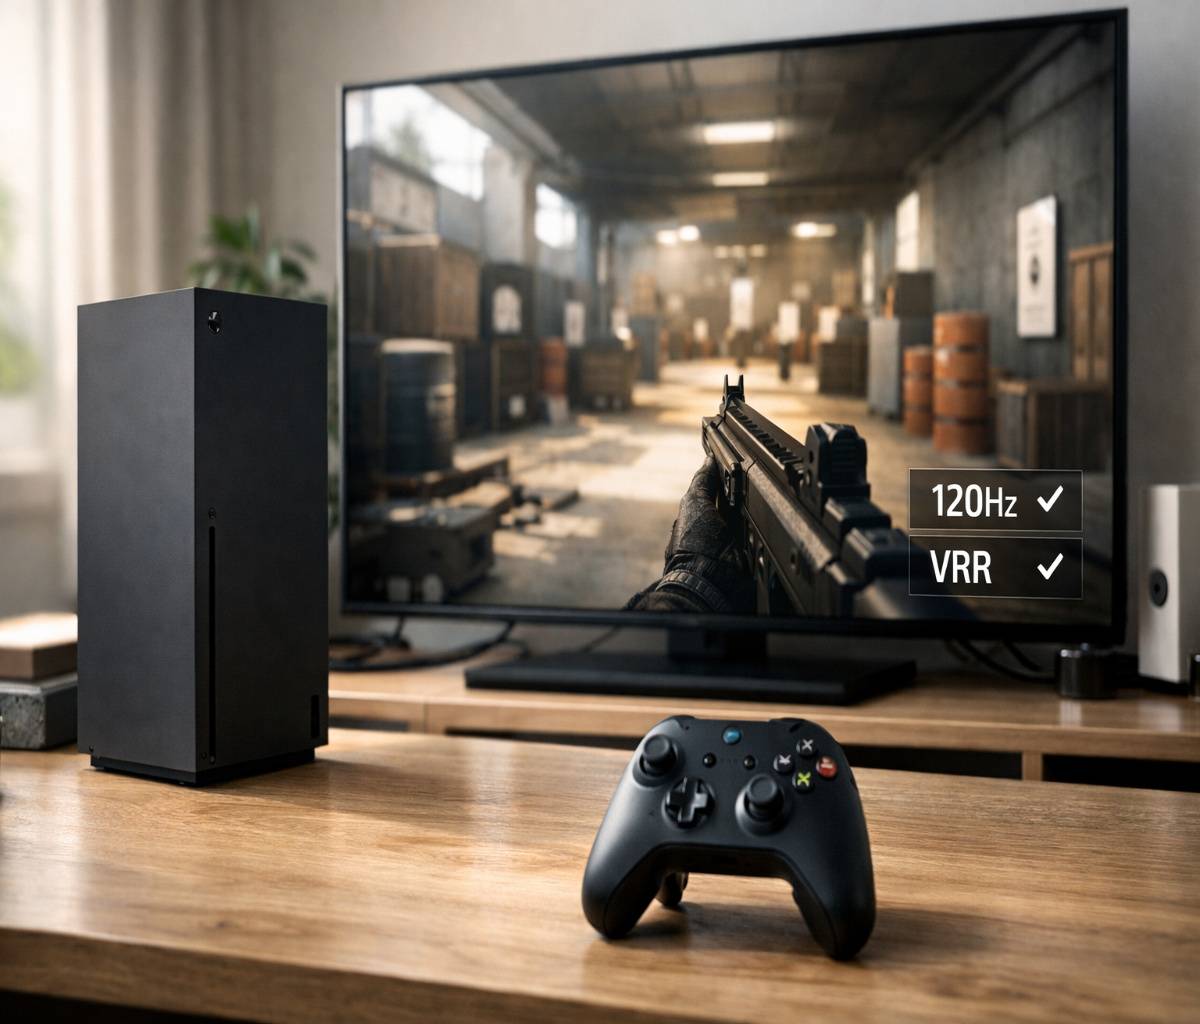
There are three concepts that matter a lot for FPS feel: 120Hz, VRR, and ALLM (Auto Low Latency Mode). They sound technical, but you can treat them like practical switches.
120Hz: the “more frequent updates” setting
120Hz is basically your console and display agreeing to update the image 120 times per second. In shooters, that can make aiming feel more connected and reduce the “mushy” sensation during fast turns—assuming the game is actually rendering high frame rates. It’s not magic, but it’s real.
VRR: smoother motion when frame rate fluctuates
VRR (Variable Refresh Rate) lets the display adjust its refresh timing to match the game’s frame output. In plain English: it can reduce screen tearing and make frame dips feel less jarring. If you play games that don’t stay perfectly locked at 120fps, VRR is often a nice quality-of-life improvement.
On Xbox, VRR is typically found under advanced video modes (Settings > General > TV & display options > Video modes), where you can allow variable refresh rate. Some setups offer options like “Always on” or “Gaming only,” and “Gaming only” is usually a safe place to start.
If enabling VRR causes flicker or weird brightness shifts (this happens on some TVs), try disabling VRR first to confirm the rest of your setup is stable. Then re-enable later. I know that sounds a bit “trial and error,” but that’s honestly how a lot of real-world living room setups go.
ALLM / Game Mode: the input-lag reducer
ALLM is Xbox asking your TV to switch into its low-latency preset automatically. Depending on your TV brand, that might be called Game Mode, Low Latency Mode, Instant Game Response, or something equally vague. The key point is that Game Mode usually disables extra image processing that adds delay.
If your TV has both Game Mode and fancy motion smoothing features, don’t be tempted. Motion smoothing is made for movies, not headshots. Turn it off for your Xbox input.
FPS Boost: how to enable it (and when it won’t be available)
FPS Boost is specifically about certain older titles (often Xbox One-era games) running at higher frame rates on Xbox Series consoles. It’s not the same thing as a modern game’s native 120fps mode, and it’s not universal. Only selected games support it.
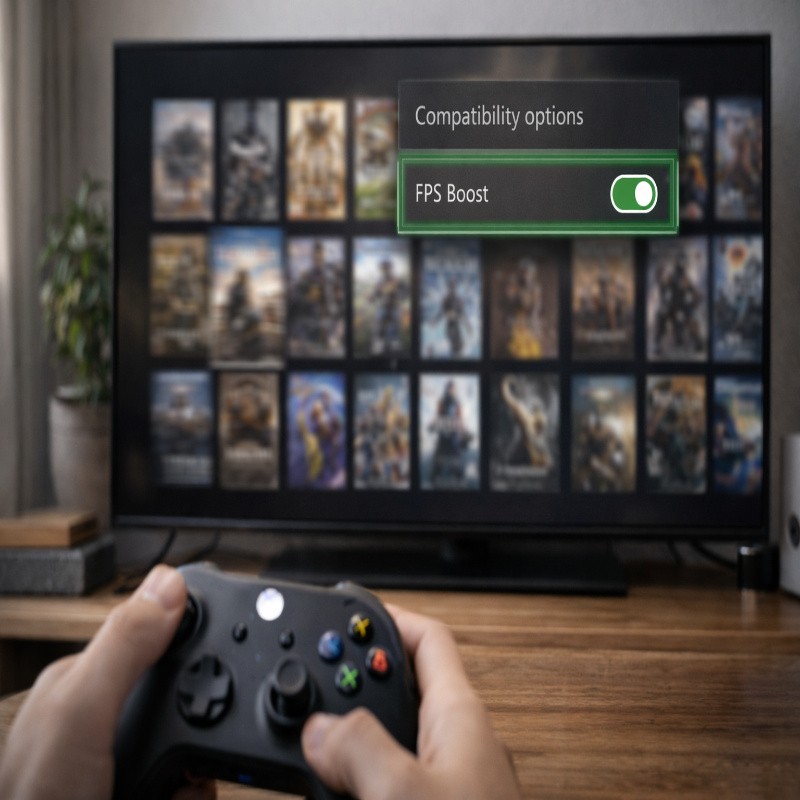
How to enable FPS Boost on a game
The fastest path is:
- While the game is highlighted (or running), press the Xbox button.
- Open the game’s options and select “Manage game and add-ons.”
- Go to “Compatibility options.”
- Toggle FPS Boost on (and Auto HDR if you want it), then restart the game for changes to apply.
Xbox also notes a useful way to confirm it: open the Guide overlay while in-game, and you may see an indicator in the upper right corner showing whether FPS Boost or Auto HDR is enabled.
One caveat that’s easy to miss: in some cases, FPS Boost isn’t enabled by default because it can require a resolution reduction to run smoothly. So if you see the toggle but it’s off, that might be why.
If you want the full deep-dive (including why you might not see “Compatibility options” at all for some titles), use our focused walkthrough: enable FPS Boost on Xbox Series X.
Controller setup for shooters (the part you’ll actually feel)
There’s a reason controller tuning has endless debates. It’s personal. It’s also context-dependent: your thumbstick wear, your playstyle, the game’s aim assist model, even whether you’re tired.
Still, there are a few settings that almost always matter for FPS games on console.
Dead zones: lower them until you get drift, then back off
Dead zone is the “ignore tiny stick movement” zone. Too high, and aim feels sluggish. Too low, and you get drift. My practical method is simple: lower dead zones until you notice drift in menus or when standing still in-game, then raise it slightly until the drift is gone.
This one change can make aiming feel immediately more responsive, especially in games with fine tracking.
Sensitivity: pick a stable baseline, then adjust slowly
It’s tempting to crank sensitivity because you watched a cracked streamer do 180-degree turns in half a second. But most players do better with a stable baseline they can repeat under pressure.
- Set a medium sensitivity you can control when you’re tense.
- Play two or three matches.
- Adjust one step at a time, not five.
I realize this sounds almost too simple, but it works because you’re teaching your hands something consistent. In an FPS, consistency is half the battle.
Aim acceleration and response curve: be cautious
Aim acceleration can help you turn fast while keeping fine aim manageable, but it can also feel unpredictable if it’s aggressive. If you’re struggling with overshooting targets, try reducing acceleration first before you touch sensitivity again.
Response curves are similar: “linear” often feels direct, “classic” can feel more forgiving, and “dynamic” can feel snappy but sometimes twitchy. There’s no universal “best” here. If you’re not sure, start with whatever the game’s default is, then change only one variable at a time.
Button layout: keep your right thumb on the stick
This is more of a habit hack than a setting. If you have to take your thumb off the right stick to jump, slide, or crouch, you lose aim control at the exact moment aim control matters. Consider:
- An alternate control layout (like bumper jumper or tactical, depending on the game).
- A controller with paddles, if you’re serious and it fits your budget.
Do you need paddles? No. Are they helpful? I think so—especially if you play a lot.
Audio setup for FPS: footsteps, direction, and “not getting surprised”
Audio is weirdly underrated until you play without it. If you can’t tell left from right, or near from far, you’re constantly reacting late.
Headset first, then tune the mix
If you have a headset, use it. Even a basic one can give you more reliable directional cues than TV speakers.
Then go into your game’s audio settings and look for:
- A “Headphones” mix (often boosts directional cues).
- Reduced dynamic range (sometimes called “night mode”), which can make footsteps stand out more consistently.
One small caution: some “cinematic” mixes make explosions huge and footsteps tiny. They’re fun, but not competitive.
Don’t chase perfect settings across every game
I used to try to make every shooter sound identical. It’s not really possible. Engines differ, mixes differ, and some games intentionally obscure footstep audio. Aim for “clear enough,” not perfect. Your brain adapts.
Network basics: lower friction, not miracles
Network performance is complicated, and I don’t want to pretend a settings tweak will give you a brand-new connection. But you can avoid a few common issues that make FPS games feel inconsistent.
Use Ethernet if you can
Wired connections are typically more stable than Wi‑Fi, especially in busy apartments or houses with a lot of devices. If you can run Ethernet, do it. If you can’t, place your console (or router) to reduce walls and interference.
Pay attention to “random spikes”
If you feel occasional lag spikes, it might be Wi‑Fi congestion, background downloads, or a router struggling under load. Pause big downloads when you play ranked. And if your router is ancient, upgrading can genuinely help—though I know that’s not the fun kind of solution.
Storage and installs: keep your FPS games where they run best
This isn’t about frame rate directly, but it affects load times and the general “snappiness” of your gaming sessions.
In general:
- Keep your main competitive FPS games on internal storage (or the official expansion storage) so you get the best performance features and fastest loading where applicable.
- Use external storage for older titles you don’t mind moving around when needed.
Also, keep some free space available. Consoles can behave better when they have breathing room for updates and caching. Not always dramatic, but noticeable over time.
Troubleshooting: when the “right” settings still don’t show up
This is the section I wish every guide had. Because, again, real setups are messy.
If 120Hz doesn’t appear as an option
- Confirm you’re on the correct TV HDMI port (some TVs only support 4K/120 on specific ports).
- Enable your TV’s enhanced HDMI setting for that port if it has one (names vary by brand).
- Remove pass-through devices temporarily and connect Xbox directly to the display.
- Try 1440p at 120Hz or 1080p at 120Hz to see if the display accepts 120Hz at a lower resolution.
- Check the console’s “4K TV details” page to see what the Xbox thinks your display supports.
If you’re in that loop where everything “should” work but doesn’t, go straight to this walkthrough: Xbox Series X 120Hz not showing. It’s built for the stubborn cases.
If VRR is greyed out or causes issues
- First confirm your display supports VRR/FreeSync over HDMI.
- If VRR causes flicker, turn it off to test stability, then try re-enabling with different combinations of resolution and refresh rate.
It’s a little annoying, but VRR is one of those features that can be flawless on one display and finicky on another.
If FPS Boost toggle is missing
Not every game supports FPS Boost, and not every title exposes the toggle. Xbox notes that FPS Boost is available on select titles, and when it is, you can toggle it via Compatibility options in Manage game and add-ons. If you don’t see Compatibility options at all, the game may not support it, or the console may not be fully updated/rebooted.
For a focused walkthrough, here’s the step-by-step again: how to enable FPS Boost on Xbox Series X.
If the game “feels laggy” even in Game Mode
This is the hard one because “laggy” can mean several different things. A few quick checks:
- Disable motion smoothing on the TV input used for Xbox.
- Confirm the game is in Performance mode (not Quality).
- Test wired internet (or pause downloads) to rule out connection spikes.
- Try a different controller profile (dead zones too high can feel like input lag).
And, yes, sometimes it’s just that the server is having a day. It happens.
A practical “best settings” baseline (so you can stop tweaking)
If you just want a starting point you can trust, here’s a baseline I’d suggest for many FPS players:
- Refresh rate: 120Hz (if your display supports it).
- Resolution: 4K UHD if stable; otherwise 1440p for 120Hz consistency.
- TV: Game Mode on; motion smoothing off.
- VRR: On if stable; off if it introduces flicker or weirdness.
- Game: Performance/High Frame Rate mode enabled.
- Controller: dead zones as low as possible without drift; moderate sensitivity; minimal aim acceleration until you’re comfortable.
If you want this as a tighter checklist, bookmark: best settings for FPS games on Xbox Series X.
Conclusion
Setting up a console for shooters is partly technical and partly personal. The technical part is making sure your Xbox and display agree on the right output—ideally 120Hz with low-latency features—then enabling FPS Boost where it applies, and finally dialing in controller and audio so you can play on instinct.
If you take nothing else from this: confirm your refresh rate, put your game in Performance mode, and don’t ignore dead zones. And if you’re building (or rebuilding) your setup from scratch, this is the simplest path to follow for How to Set Up Xbox Series X for FPS Games without getting stuck in a settings spiral.
